
Estimated reading time: 5 minutes
Access to quality healthcare is important, and taking the first step to your PhilHealth registration helps ensure financial support for medical needs.
Whether you’re a first-time job seeker, self-employed, or just planning to become a PhilHealth member, knowing the requirements is crucial for a smooth application process.
Table of contents
Now that you’ve been guided in understanding how PhilHealth works you may want to proceed with applying for a membership.
This guide provides a step-by-step explanation of how to register for PhilHealth, whether you choose to visit the nearest PhilHealth office or register online.
By following these steps, you will know how to get your PhilHealth ID online, access your ID number, and download your MDR for various healthcare benefits.
Walk-In and Online Process
PhilHealth offers two ways to apply for membership—walk-in registration at their office or an online application.
We’ll walk you through the process based on our own experience using a hybrid method. This way, you’ll know exactly what to expect and how to make your registration smoother.
Walk-In Registration Process
Step 1: Obtain a First-Time Job Seeker Certificate (If Applicable)
- Visit your barangay office to request a Certificate of First-Time Job Seeker.
- If you do not have this certificate, a registration fee of Php 500 is required.
Tip: Secure this certificate ahead of time to avoid delays at the PhilHealth office.
Step 2: Prepare the Required Documents
Ensure you have the following documents photocopied:
- PSA Birth Certificate
- Valid Government-Issued IDs
- 1×1 ID photo (one piece)
- First-Time Job Seeker Certificate from the barangay (if applicable)
Tips:
- Bring extra photocopies and a pen to avoid delays in filling out forms.
- Place all documents in an envelope for easy access and organization.
Step 3: Visit the Nearest PhilHealth Office
- Submit your documents to the PhilHealth registration desk.
- Fill out the PhilHealth Member Registration Form (PMRF) with your details.
- Wait for processing.
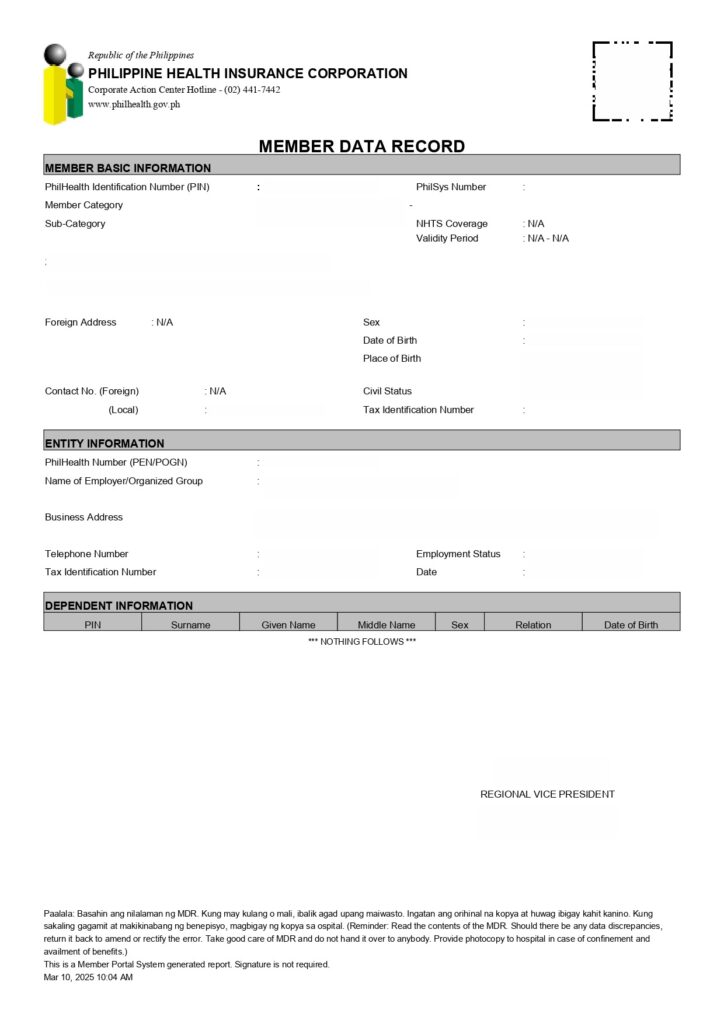
Step 4: Receive Your PhilHealth Member Data Record (MDR) and ID
- Once your registration is complete, you will receive your MDR.
- If you need a physical PhilHealth ID, you must claim it in person at the PhilHealth office.
Online Registration Process
Step 1: Fill Out the PMRF Online
- Visit the PhilHealth Member Portal.
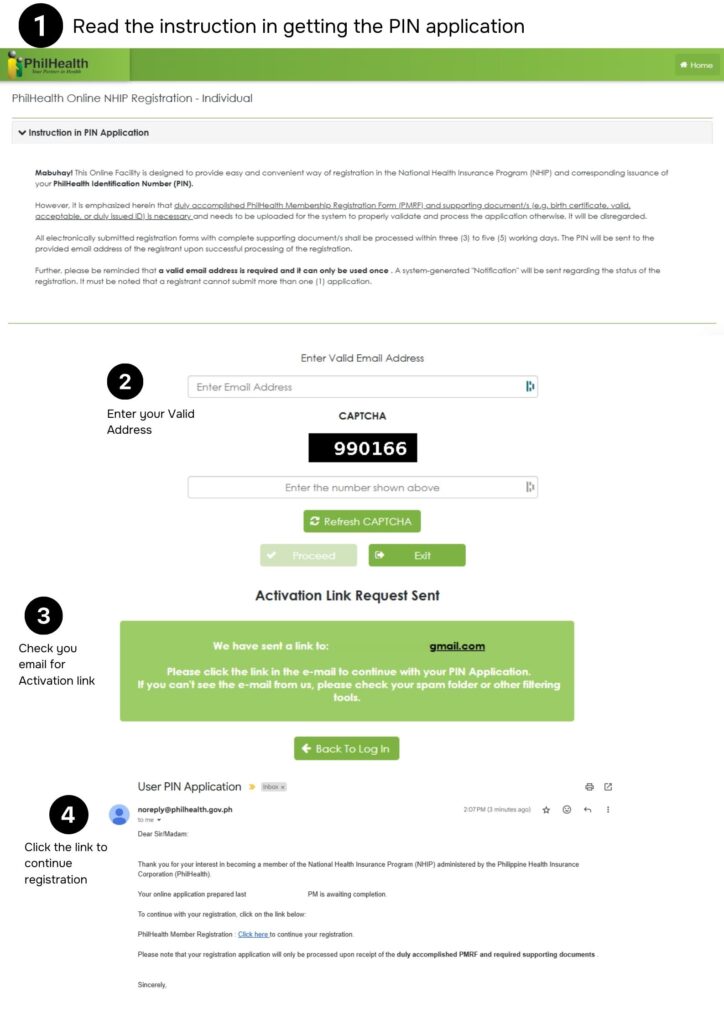
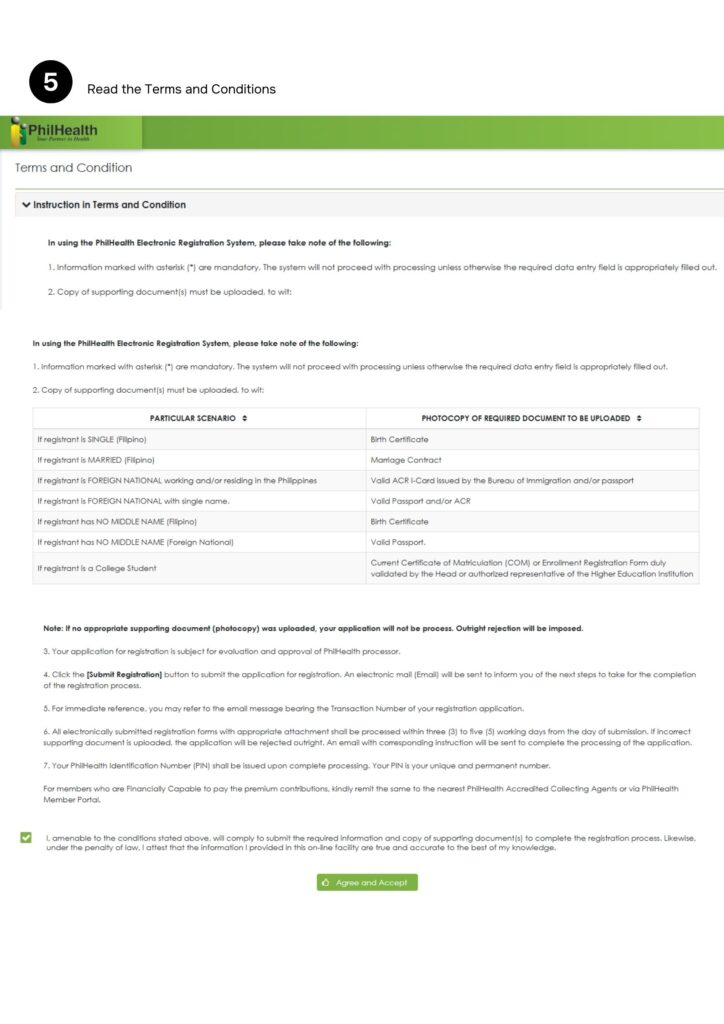
- Complete the PhilHealth Member Registration Form (PMRF) with your details.
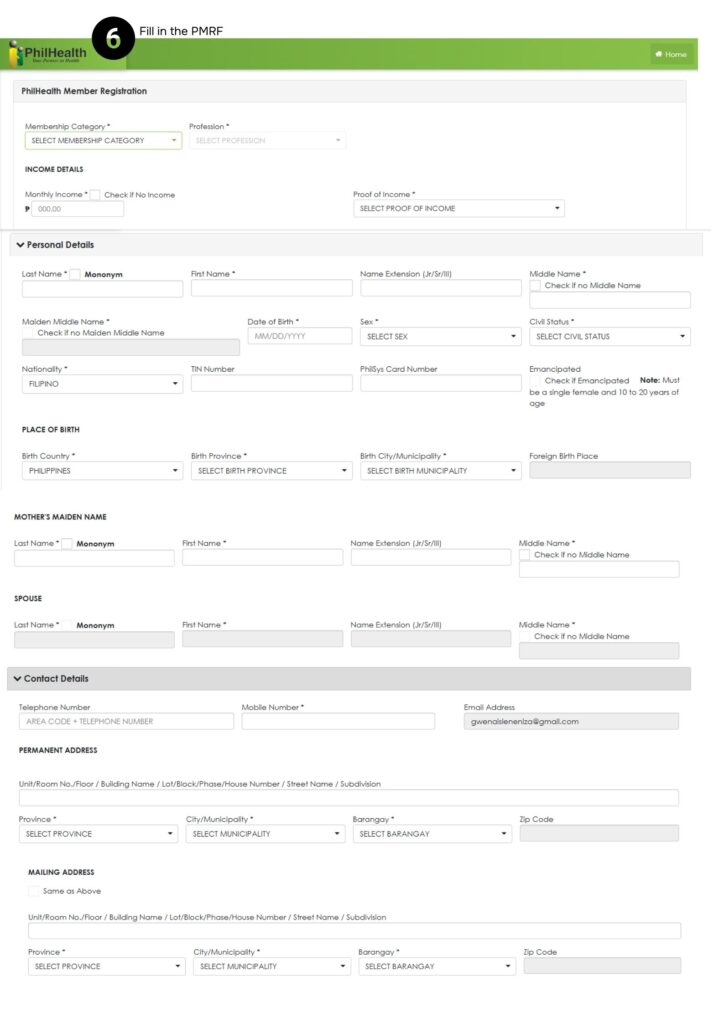
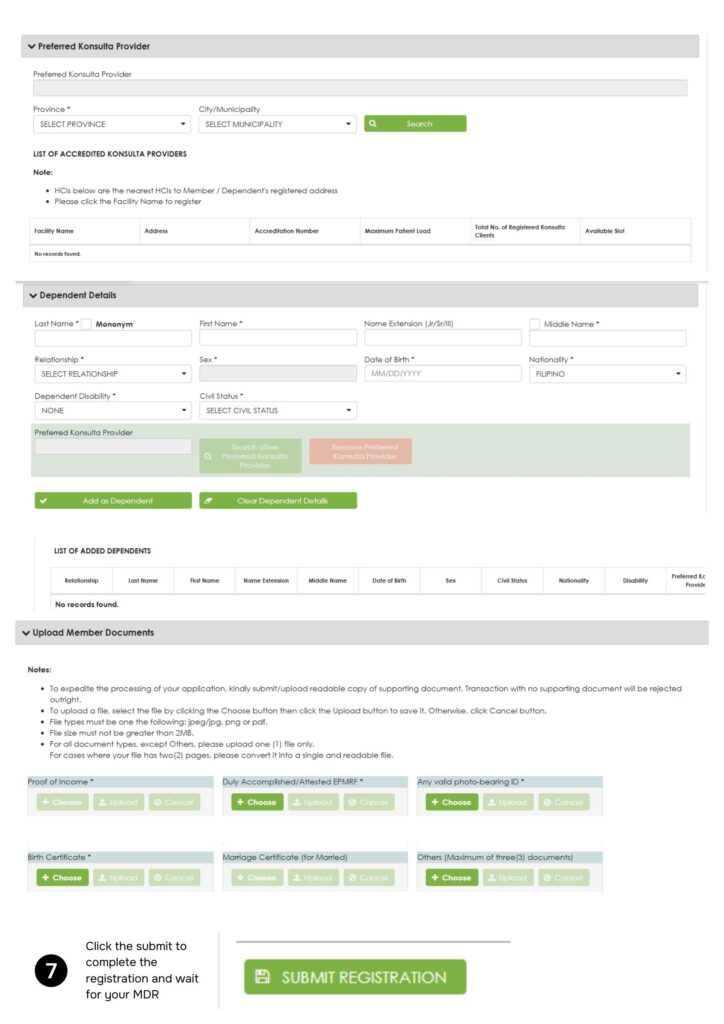
- Submit the form online.
Tips:
- Ensure your internet connection is stable and use a desktop or laptop for a smoother experience.
- Take a screenshot of your confirmation page as proof of submission.
Step 2: Obtain Your Member Data Record (MDR)
- Once your registration is approved, you can download and print your MDR.
- A self-printed MDR is valid for transactions.
Tips:
- Save a digital copy on your phone for quick access when needed.
- Print multiple copies for backup.
Step 3: Claim Your PhilHealth ID
- Unlike the MDR, the PhilHealth ID must be collected in person at the nearest PhilHealth office.
- Bring all the required documents listed above for verification.
Tips:
- Bring a valid ID to avoid issues in claiming your PhilHealth ID.
By following these steps, you can successfully register for PhilHealth and gain access to its healthcare benefits. Whether through a walk-in or online process, securing your membership ensures financial assistance for medical expenses.
If you’re a first-time job seeker with a Certificate of First-Time Job Seeker from your barangay, your registration is free. Otherwise, a registration fee of Php 500 is required.
If you lose your PhilHealth ID, visit the nearest PhilHealth office and request a replacement. If you lose your MDR, you can download and print a copy from the PhilHealth Member Portal.
To update your details (such as a change in address, civil status, or dependents), fill out a PhilHealth Member Registration Form (PMRF) and submit it at any PhilHealth office or online through the portal.
Leave a Reply